Tambourine作業メモ

主にスキル習得のためにやった作業のメモ。他人には基本的に無用のものです。

ケント・ベックの「テスト駆動開発」の写経をRustでやってみる(4)

2章「明白な実装」に入る。

仕様が変わった。timesメソッドはDollarを返す様になった。 あ、今、私のtypoも見つかった。DollarじゃなくてDollerになってる・・・。

ともあれ、仕様変更の結果、テストはこうなった。

    #[test]
    fn test_multiplication() {
        let five = Dollar { amount: 5 };
        let five_times_two = five.times(2);
        assert_eq!(10, five_times_two.amount);
        let five_times_three = five.times(3);
        assert_eq!(15, five_times_three.amount);
    }

Dollar構造体のインスタンス(って表現して良いのかな?)がimmutableで良くなったので、 なんとなくコードの質的にもよくなった気がする。

さて、これを通すためにコードを修正するのだが・・・ コンパイルは出来るがエラーになる状態にするのが難しい。流石Rustである。 というわけで、コンパイルが通るようにしたらここまで直してしまった。

impl Dollar {
    pub fn times(&self, multiplier: i32) -> Dollar {
        Dollar {
            amount: self.amount * multiplier,
        }
    }
}

mutableな借用を貰えなくなったが、もちろんそれで問題ない。 テストはちゃんと通った。よしよし。

テストコードだが、Javaのコードに対応するためにfive.times()の戻りを 変数に代入しているが、immutableにしているのでその直後でしか使っていない。 なら、直接assert_eq!に渡してしまっても同じなので、変更しちゃう。

    #[test]
    fn test_multiplication() {
        let five = Dollar { amount: 5 };
        assert_eq!(10, five.times(2).amount);
        assert_eq!(15, five.times(3).amount);
    }

もちろん、テストがグリーンのままであることを確認しておく。 これで2章は終わりだ。

ケント・ベックの「テスト駆動開発」の写経をRustでやってみる(3)

いよいよ「テスト駆動開発」に入っていこう。

まずは、P4の最初のテストだ。おもむろに存在しないDollerクラスをnewして、 ありもしないtimesメソッドやamountフィールドを参照している。テストファーストなのだ。

・・・Rustでデータ型を表現するのはどうするんだったかな・・・(本をめくる)・・・ 構造体だ。ざっと眺めて要点を飲み込む。

こんな感じでいいんだろうか。

fn main() {
    println!("Hello, world!");
}

#[cfg(test)]
mod tests {
    use super::*;

    #[test]
    fn test_multiplication() {
        let five = Doller { amount: 5 };
        five.times(2);
        assert_eq!(10, five.amount);
    }
}

まず、Rustにおいて関数のテストは同じファイル内に書く。 単に#[test]と属性を付ければ、それがテストだと見なされる。

ただし、慣例としてtestsというモジュールを作り、その中に入れる。 そこに#[cfg(test)]と属性を付けておけば、テストはtest実行以外の場合ではビルド対象から外される。

で、VScodeでテストを走らせるにはどうしたら良いのか。 コードで#[test]と書くと、その下に Run test という表示が出て、押すとテストが走る。 これはRust(rls)拡張機能がやっているらしい。

押すと、ターミナルが開き、こんな感じのログが流れた。

> Executing task: cargo test -- --nocapture test_multiplication <

   Compiling money v0.1.0 (/Users/tambara/study/tdd_rust/money)
error[E0422]: cannot find struct, variant or union type `Doller` in this scope
  --> src/main.rs:11:20
   |
11 |         let five = Doller { amount: 5 };
   |                    ^^^^^^ not found in this scope

warning: unused import: `super::*`
 --> src/main.rs:7:9
  |
7 |     use super::*;
  |         ^^^^^^^^
  |
  = note: `#[warn(unused_imports)]` on by default

error: aborting due to previous error

For more information about this error, try `rustc --explain E0422`.
error: could not compile `money`.

To learn more, run the command again with --verbose.
The terminal process terminated with exit code: 101

Terminal will be reused by tasks, press any key to close it.

要するに cargo で特定のテストだけ実行しているわけだ。

テストを全部流したかったらどうするのか・・・メニューのTerminal - Run Taskから出来るみたい。

> Executing task: cargo test <

   Compiling money v0.1.0 (/Users/tambara/study/tdd_rust/money)
error[E0422]: cannot find struct, variant or union type `Doller` in this scope
  --> src/main.rs:11:20
   |
11 |         let five = Doller { amount: 5 };
   |                    ^^^^^^ not found in this scope

warning: unused import: `super::*`
 --> src/main.rs:7:9
  |
7 |     use super::*;
  |         ^^^^^^^^
  |
  = note: `#[warn(unused_imports)]` on by default

error: aborting due to previous error

For more information about this error, try `rustc --explain E0422`.
error: could not compile `money`.

To learn more, run the command again with --verbose.
The terminal process terminated with exit code: 101

Terminal will be reused by tasks, press any key to close it.

確かにcargo testをやってる。

で、エラーの方は、Dollerってなんやねんと言われている。それはそうだ。

P6 でやっているように、空の実装を足してやる。

// これ消すと怒られるのなぜ?
fn main() {}

pub struct Doller {
    pub amount: i32,
}

impl Doller {
    pub fn times(multiplier: i32) {}
}

#[cfg(test)]
mod tests {
    use super::*;

    #[test]
    fn test_multiplication() {
        let five = Doller { amount: 5 };
        five.times(2);
        assert_eq!(10, five.amount);
    }
}

良さそうに思えるけど、まだコンパイルが通らない。

error[E0599]: no method named `times` found for struct `Doller` in the current scope
  --> src/main.rs:19:14
   |
4  | pub struct Doller {
   | ----------------- method `times` not found for this
...
19 |         five.times(2);
   |         -----^^^^^
   |         |    |
   |         |    this is an associated function, not a method
   |         help: use associated function syntax instead: `Doller::times`
   |
   = note: found the following associated functions; to be used as methods, functions must have a `self` parameter
note: the candidate is defined in an impl for the type `Doller`
  --> src/main.rs:9:5
   |
9  |     pub fn times(multiplier: i32) {}
   |     ^^^^^^^^^^^^^^^^^^^^^^^^^^^^^

Rustはコンパイルを通すのが凄く難しい言語だが、 エラーメッセージが驚くほど親切だ。

Dollerにはtimesなんてメソッドはないぞと怒られているんだけども、 「お前、selfをパラメータに入れ忘れてるんじゃね?」と教えてくれている。

そう、Rustで構造体のメソッドを定義したいのなら、1つ目のメソッドはselfにしないといけない。 こうだ。

impl Doller {
    pub fn times(&mut self, multiplier: i32) {}
}

エラーが変わった。

  --> src/main.rs:19:9
   |
18 |         let five = Doller { amount: 5 };
   |             ---- help: consider changing this to be mutable: `mut five`
19 |         five.times(2);
   |         ^^^^ cannot borrow as mutable

fiveがmutableじゃないとダメと怒られた。それはそうだ。

    fn test_multiplication() {
        let mut five = Doller { amount: 5 };
        five.times(2);
        assert_eq!(10, five.amount);
    }

こうなってないといけない。これでエラーが消えた。

> Executing task: cargo test <

warning: unused variable: `multiplier`
 --> src/main.rs:9:29
  |
9 |     pub fn times(&mut self, multiplier: i32) {}
  |                             ^^^^^^^^^^ help: consider prefixing with an underscore: `_multiplier`
  |
  = note: `#[warn(unused_variables)]` on by default

    Finished test [unoptimized + debuginfo] target(s) in 0.00s
     Running target/debug/deps/money-043e3ba9eebcce93

running 1 test
test tests::test_multiplication ... FAILED

failures:

---- tests::test_multiplication stdout ----
thread 'tests::test_multiplication' panicked at 'assertion failed: `(left == right)`
  left: `10`,
 right: `5`', src/main.rs:20:9
note: run with `RUST_BACKTRACE=1` environment variable to display a backtrace


failures:
    tests::test_multiplication

test result: FAILED. 0 passed; 1 failed; 0 ignored; 0 measured; 0 filtered out

error: test failed, to rerun pass '--bin money'
The terminal process terminated with exit code: 101

うん。ちゃんとテスト結果も出ている。FAILEDだ。 しかし、グリーンなのかレッドなのかわかりにくいな・・・。

では、グリーンにしておこうか。

// これ消すと怒られるのなぜ?
fn main() {}

pub struct Doller {
    pub amount: i32,
}

impl Doller {
    pub fn times(&mut self, multiplier: i32) {
        self.amount *= multiplier;
    }
}

#[cfg(test)]
mod tests {
    use super::*;

    #[test]
    fn test_multiplication() {
        let mut five = Doller { amount: 5 };
        five.times(2);
        assert_eq!(10, five.amount);
    }
}
> Executing task: cargo test -- --nocapture test_multiplication <

    Finished test [unoptimized + debuginfo] target(s) in 0.00s
     Running target/debug/deps/money-043e3ba9eebcce93

running 1 test
test tests::test_multiplication ... ok

test result: ok. 1 passed; 0 failed; 0 ignored; 0 measured; 0 filtered out

テストが通った。素晴らしい。これで、1章は終わりだ。

ケント・ベックの「テスト駆動開発」の写経をRustでやってみる(2)

最初にやるのはcargo newである。

> cargo new money
     Created binary (application) `money` package
> cd money
> ls -la
total 16
drwxr-xr-x  6 tambara  staff  192  3 20 17:48 .
drwxr-xr-x  3 tambara  staff   96  3 20 17:48 ..
drwxr-xr-x  8 tambara  staff  256  3 20 17:48 .git
-rw-r--r--  1 tambara  staff    8  3 20 17:48 .gitignore
-rw-r--r--  1 tambara  staff  226  3 20 17:48 Cargo.toml
drwxr-xr-x  3 tambara  staff   96  3 20 17:48 src

.gitまで出来ちゃう辺りが新世代って感じ。

さて、まずは実行してみますか。

> cargo run
   Compiling money v0.1.0 (/Users/tambara/study/tdd_rust/money)
    Finished dev [unoptimized + debuginfo] target(s) in 0.34s
     Running `/Users/tambara/study/tdd_rust/money/target/debug/money`
Hello, world!

Hello, worldが書かれていたようだ(笑)。

さて、もちろんVimでコードを書いていってもいいわけだけど、 今回はVScodeも使ってみたい。 私は本当に手に馴染んだIDEというものがないのだ。

では、単純にVScodeでこのディレクトリを開いてみよう。

f:id:Tambourine:20200320182718p:plain

このファイルがRustのソースコードであることは知っているわけだ。

ただし、このレベルではVimと大差ない。 Rustは公式のLanguage Serverがあるらしいので、もっと格好良くなるはず。

というわけで、拡張を入れる事にする。 拡張をクリックすると、RECOMMENDEDのトップにRust(rls)が出ている。 入れるべきなのはこれなんだけど、「お前、Rust書くのか。・・・入れるだろ」と 見透かされているようでなんかムカつく(笑)。

ま、入れますけど。

入れると、「rls入ってへんがな」と怒られる。

f:id:Tambourine:20200320184803p:plain

https://github.com/rust-lang/rls

を見て、インストールする。

> rustup update
info: syncing channel updates for 'stable-x86_64-apple-darwin'
info: checking for self-updates

  stable-x86_64-apple-darwin unchanged - rustc 1.42.0 (b8cedc004 2020-03-09)

info: cleaning up downloads & tmp directories
> rustup component add rls rust-analysis rust-src
info: downloading component 'rls'
info: installing component 'rls'
info: downloading component 'rust-analysis'
info: installing component 'rust-analysis'
info: downloading component 'rust-src'
info: installing component 'rust-src'

これでいいのかな?

ステータスバーのRLSのところがRLS:startingのままになって 動かない状態になって上手く動かなかったんだけど、 その後、最新版へのUPDATE指示が出て、更新して再起動したら動いた。なんか謎。

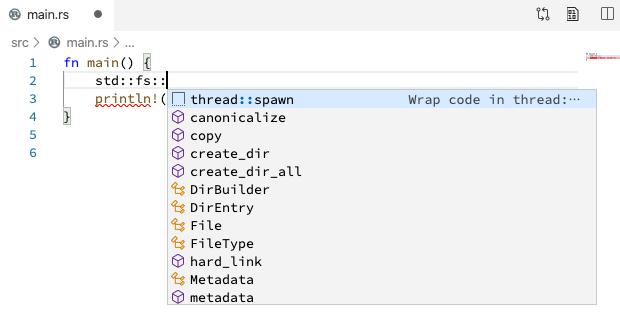
f:id:Tambourine:20200320191334p:plain

サジェスチョンでるようになった。おおー。

ケント・ベックの「テスト駆動開発」の写経をRustでやってみる(1)

社内で、ケント・ベックの「テスト駆動開発」を写経する会を立ち上げて、アドバイザーみたいなことをやることになった。良いコードを書くにはまだ及ばないが、酷いテストコードを直す経験ならちょっとしたものである(笑)。

とりあえず、参加メンバーはあまり普段コードを書かないような人(うちの社内はそういう人の方が多いのだ)になるだろうから、書籍と全く同じようにJavaで書く。もうホントに一字一句その通りにやるのが良いと思う。というわけで、スタートガイドのようなものをQiitaに書いた。

qiita.com

その一方で、私はJavaでやってもつまらないので、Rustでやってみることにする。Rustは2年前に社内の勉強会でちょっと触って以来だ。そのときに一度インストールはしたのだが、その後、Diskが飛んでいるのでまたインストールするところからのスタートである。

さて、こういう時は本家からスタートするに限る。

Rustプログラミング言語

インストールのページを見に行くと

curl --proto '=https' --tlsv1.2 -sSf https://sh.rustup.rs | sh

をやれと書いてある。homebrewでも入れられるけど、こっちとデフォルトで入るモノが違ったりするらしいので、公式に従うことにする。

> curl --proto '=https' --tlsv1.2 -sSf https://sh.rustup.rs | sh
info: downloading installer

Welcome to Rust!

This will download and install the official compiler for the Rust
programming language, and its package manager, Cargo.

It will add the cargo, rustc, rustup and other commands to
Cargo's bin directory, located at:

  /Users/tambara/.cargo/bin

This can be modified with the CARGO_HOME environment variable.

Rustup metadata and toolchains will be installed into the Rustup
home directory, located at:

  /Users/tambara/.rustup

This can be modified with the RUSTUP_HOME environment variable.

This path will then be added to your PATH environment variable by
modifying the profile files located at:

  /Users/tambara/.profile
/Users/tambara/.bash_profile

You can uninstall at any time with rustup self uninstall and
these changes will be reverted.

Current installation options:


   default host triple: x86_64-apple-darwin
     default toolchain: stable
               profile: default
  modify PATH variable: yes

1) Proceed with installation (default)
2) Customize installation
3) Cancel installation
>

info: profile set to 'default'
info: default host triple is x86_64-apple-darwin
info: syncing channel updates for 'stable-x86_64-apple-darwin'
info: latest update on 2020-03-12, rust version 1.42.0 (b8cedc004 2020-03-09)
info: downloading component 'cargo'
info: downloading component 'clippy'
info: downloading component 'rust-docs'
 12.1 MiB /  12.1 MiB (100 %)  11.7 MiB/s in  1s ETA:  0s
info: downloading component 'rust-std'
 16.1 MiB /  16.1 MiB (100 %)   8.2 MiB/s in  1s ETA:  0s
info: downloading component 'rustc'
 54.5 MiB /  54.5 MiB (100 %)   8.7 MiB/s in  6s ETA:  0s
info: downloading component 'rustfmt'
info: installing component 'cargo'
info: installing component 'clippy'
info: installing component 'rust-docs'
 12.1 MiB /  12.1 MiB (100 %)   2.9 MiB/s in  3s ETA:  0s
info: installing component 'rust-std'
 16.1 MiB /  16.1 MiB (100 %)  14.9 MiB/s in  1s ETA:  0s
info: installing component 'rustc'
 54.5 MiB /  54.5 MiB (100 %)   8.7 MiB/s in  6s ETA:  0s
info: installing component 'rustfmt'
info: default toolchain set to 'stable'

  stable installed - rustc 1.42.0 (b8cedc004 2020-03-09)


Rust is installed now. Great!

To get started you need Cargo's bin directory ($HOME/.cargo/bin) in your PATH
environment variable. Next time you log in this will be done
automatically.

To configure your current shell run source $HOME/.cargo/env

.profileにはちゃんとパスの設定も入っている。

> cat .profile 

export PATH="$HOME/.cargo/bin:$PATH"

が、こちらはfish遣いなので、自分でやる。

.config/fish/config.fishの末尾に

# Rust
set -x PATH $HOME/.cargo/bin $PATH

を書き足せばOKだ。

> rustup --version
rustup 1.21.1 (7832b2ebe 2019-12-20)
> rustc --version
rustc 1.42.0 (b8cedc004 2020-03-09)
> cargo --version
cargo 1.42.0 (86334295e 2020-01-31)

とりあえず、一安心。

docsifyを入れてみる

下準備

まずはNode.jsを入れるところから。

> brew install nodebrew

Warning: nodebrew 1.0.1 is already installed and up-to-date
To reinstall 1.0.1, run `brew reinstall nodebrew`

あれ?

> nodebrew -v
nodebrew 1.0.1

Usage:
    nodebrew help                         Show this message
(以下略)
> nodebrew list
v10.15.3
v12.2.0

current: none

あー。

> nodebrew use v12.2.0
use v12.2.0
> nodebrew list
v10.15.3
v12.2.0

current: v12.2.0

とりあえず、これで。気が向いたら更新する。

> node -v
v12.2.0
> npm -v
6.9.0

下準備はOK

Quick start

docsify.js.org をやってみる。

> npm install docsify-cli -g
/Users/tambara/.nodebrew/node/v12.2.0/bin/docsify -> /Users/tambara/.nodebrew/node/v12.2.0/lib/node_modules/docsify-cli/bin/docsify

> fsevents@1.2.9 install /Users/tambara/.nodebrew/node/v12.2.0/lib/node_modules/docsify-cli/node_modules/fsevents
> node install

node-pre-gyp WARN Using needle for node-pre-gyp https download 
[fsevents] Success: "/Users/tambara/.nodebrew/node/v12.2.0/lib/node_modules/docsify-cli/node_modules/fsevents/lib/binding/Release/node-v72-darwin-x64/fse.node" is installed via remote

> core-js@2.6.9 postinstall /Users/tambara/.nodebrew/node/v12.2.0/lib/node_modules/docsify-cli/node_modules/core-js
> node scripts/postinstall || echo "ignore"

Thank you for using core-js ( https://github.com/zloirock/core-js ) for polyfilling JavaScript standard library!

The project needs your help! Please consider supporting of core-js on Open Collective or Patreon: 
> https://opencollective.com/core-js 
> https://www.patreon.com/zloirock 

Also, the author of core-js ( https://github.com/zloirock ) is looking for a good job -)


> docsify@4.9.4 postinstall /Users/tambara/.nodebrew/node/v12.2.0/lib/node_modules/docsify-cli/node_modules/docsify
> opencollective postinstall


                         Thanks for installing docsify 🙏
                 Please consider donating to our open collective
                        to help us maintain this package.

                           Number of contributors: 140
                              Number of backers: 12
                              Annual budget: US$ 158
                             Current balance: US$ 257

          👉  Donate: https://opencollective.com/docsify/donate

+ docsify-cli@4.3.0
added 456 packages from 207 contributors in 24.511s

自分の日記の場所で初期化する。

> docsify init ./diary

Initialization succeeded! Please run docsify serve ./diary
> cd diary/
> ls -la
total 16
drwxr-xr-x   7 tambara  staff  224  9 28 08:13 .
drwxr-xr-x@  8 tambara  staff  256  9 23 13:28 ..
-rw-r--r--   1 tambara  staff    0 10 26  1985 .nojekyll
drwxr-xr-x  14 tambara  staff  448  5  8 23:22 2018
drwxr-xr-x  12 tambara  staff  384  9  2 10:23 2019
-rw-r--r--   1 tambara  staff   34 10 26  1985 README.md
-rw-r--r--   1 tambara  staff  612  9 28 08:13 index.html

以下の3つのファイルが出来てる。

  • index.html
  • README.md
  • .nojekyll

カレントディレクトリに戻って起動してみる。

> docsify serve diary

Serving /Users/tambara/diary now.
Listening at http://localhost:3000

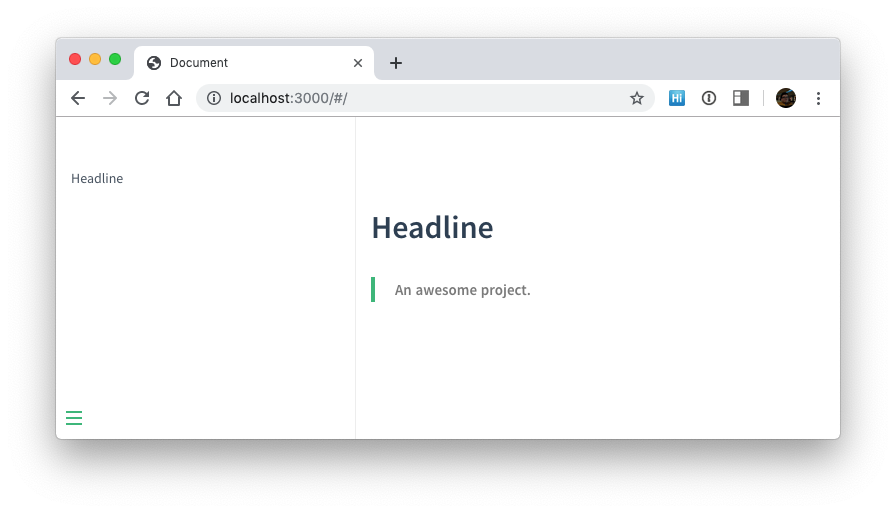
何にもないページが出る

f:id:Tambourine:20190928082935p:plain

しばらくmarkdownで作業のメモを作るようにしていたので、過去に書いたメモはURLを指定すれば読める。

diary/2018/12/20181224.md というファイルを表示してみる。

f:id:Tambourine:20190928083147p:plain

なるほど。

とりあえず、動いてる。いったん、ここまで。次はディレクトリにあるファイルの一覧をブラウザで取れるようにしてみよう。

Java13にヒアドキュメントが入ったらしい

http://jdk.java.net/13/ からダウンロード。展開して、

> sudo mv ./jdk-13.jdk/ /Library/Java/JavaVirtualMachines/
> /usr/libexec/java_home
/Library/Java/JavaVirtualMachines/jdk-13.jdk/Contents/Home
> set -x JAVA_HOME (/usr/libexec/java_home -v 13)
> echo $JAVA_HOME
/Library/Java/JavaVirtualMachines/jdk-13.jdk/Contents/Home
> java --version
openjdk 13 2019-09-17
OpenJDK Runtime Environment (build 13+33)
OpenJDK 64-Bit Server VM (build 13+33, mixed mode, sharing)

てな感じ。環境変数のセットの部分はfishを使っているのでこうなっている。

さっそく試す。

> jshell
|  JShellへようこそ -- バージョン13
|  概要については、次を入力してください: /help intro

jshell> String hoge = """
   ...> ID, Name, Sex
   ...> G3, アムロ, M
   ...> C109, ハヤト, M
   ...> 006, セイラ, F
   ...> """
|  エラー:
|  テキスト・ブロックはプレビュー機能であり、デフォルトで無効になっています。
|    (テキスト・ブロックを有効にするには--enable-previewを使用します)
|  String hoge = """
|                ^

しょぼーん

> jshell --enable-preview
|  JShellへようこそ -- バージョン13
|  概要については、次を入力してください: /help intro

jshell> String hoge = """
   ...> ID, Name, Sex
   ...> G3, アムロ, M
   ...> C109, ハヤト, M
   ...> 006, セイラ, F
   ...> """
hoge ==> "ID, Name, Sex\nG3, アムロ, M\nC109, ハヤト, M\n006, セイラ, F\n"

いえーい。

DataGripでモデルの絵を書く

絵は本来、「描く」ものだが、データモデリングの場合、「書く」のが正しい気がするのでタイトルはわざとである。つっこまないように。そして、見習わないように。

さて、DataGripの話をしようとしていたのにAWSに不慣れなせいでDBに接続するところで前回は力尽きた。 早速、テーブルを作っていこう・・・と言いたいところだが、さくさく作れるので途中のスクリーンショットも撮らずに喜んでひとしきり作ってしまった。

f:id:Tambourine:20190715122324p:plain

まず、DB接続をした直後は、"hogefuta"という適当に付けたDB接続定義の直下に、schemasとcollationsという2つがある。schemasの下にはinfomation_schemaというメタ情報を格納するのだと思われるスキーマだけがあるので、まずはスキーマを1つ作る。operationにした。システム運用に関するデータモデルを作るつもりだったのだ。

その直下にテーブルを作っていく。テーブル作成のダイアログはこんな感じ。

f:id:Tambourine:20190715123112p:plain

すこぶる簡単だ。

ダイアログを書くには外部キー制約を付ける。基本的に勝手にテーブル同士を結ぶことはできないみたいだ。

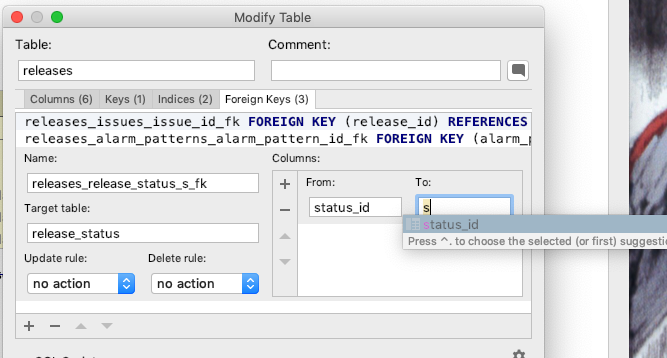
外部キーを付けるのも簡単

f:id:Tambourine:20190715123303p:plain

ちゃんと補完も入れてくれる。さすがJetBrains製。

というわけで、ひとしきりテーブル設計をした上で、Databaseビューで1つテーブルを選んで右クリック。[Diagrams] - [Show Visualisation...]を選ぶとこんな感じ。外部キーとして見ているテーブルも一緒に出てくる。

f:id:Tambourine:20190715123642p:plain

レイアウトは何種類か選べる。

f:id:Tambourine:20190715123821p:plain

テーブルの位置は動かせるけど覚えてくれない。線の出る位置などもいじれないので、そのへんの見た目はあんまり頑張れないみたい。

参照しているキーの表示・非表示、PKとそれ以外のカラムそれぞれの表示・非表示が設定できるので、思いっきり表示を絞って30弱作ったテーブルを全部表示させてみると、

f:id:Tambourine:20190715124402p:plain

わかりやすくはないね。ちなみに色はテーブルごとに選んで付けることが出来る。テーブルをグループ分けできるのでとても良い。ただし、見た目だけね。

f:id:Tambourine:20190715130346p:plain

前述の通り、テーブルを選んで作図させると参照しているテーブルも表示される。これは嬉しい時も嬉しくないときもあるんだけど、1度表示させておいて、図で右クリックして指定したテーブルの表示を消すことが出来る。

f:id:Tambourine:20190715130538p:plain

[Delete]をクリックするのはちょっと怖いけど、別にテーブルがドロップしたりはしない。

というわけで、ひとまず目的は果たした。

データモデリングというとこのように実際にDDLをDBに投げてテーブルを作るレベルよりもすこし上流の、つまりいい加減なレベルで書きたいことが多い。ER図のようにカラスの足みたいなカーディナリティの表記もできないし、そもそもカラム間の参照があるところしか線が引かれないのでデータモデリングという意味ではこれはちょっと違うよねって感じだが、開発に近いレベルであったり、すでに動いているアプリケーションについて分析したりする上ではこれはとてもよく出来たツールだと思う。そもそも、人間が手でちまちまる絵とDDLの整合性を取って保存しておくことはなんだかよくわからない仕様を生み出しかねないので、図は書けるけどDDL(と、色づけ)の情報しか保持せずに図は自動で生成したものしかないっす!という仕様も1つの妥当な選択であり、これはこれでいいんじゃないかと思う。なにせ、BlueworksLiveで書いたプロセスを見ながら数時間うーむと悩んだだけでこれだけのデータモデルが作れたのだから立派なものだ。ExcelPowerPointでやっていたら死んでた。

今回は絵を書くことが目的だったので、データをつっこんだり、ぶっこぬいたり、クエリしたりという本来の機能はなんも使わなかったのだけど、この分ならそのあたりの機能もちゃんと使えることだろう。あと、起動も含めて操作が軽いのもいいですね。Javaで作ってるのに(というのは、MacJava実行環境なんてそんな頑張られてないだろうという偏見を持っているということなんだけど)偉いなあ。